Introduction
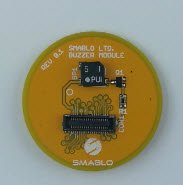
Smablo buzzer shield is a shield equipped with a small lightweight simple buzzer generating simple sounds depending on paramaters such as frequency, duration of sound, duration of pause between sounds and number of sounds. It can generate sound at minimum 78 dBA with low power operation which is saving power when operating on a battery.

Applications
Smablo Buzzer Shield can be used in variety of project when you need a simple sounds to indicate some state or alert. Typical applications:
- Simple toys and robots
- Confirmations and status
- Various types of alarms
- Etc.
Getting started
To get started with Smablo Buzzer Shield you will need:
- Smablo Development Board
- Smablo Buzzer Shield Shield
- Smablo CPU
- Smablo SDK
- Visual Studio Code
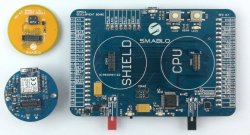
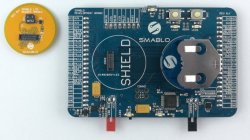
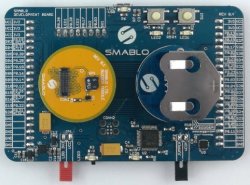
Take Smablo development board from your Smablo Development Kit and place CPU and Smablo Buzzer Shield on the described connectors like in the pictures and video below:
 {.force-inline}
 {.force-inline}
 {.force-inline}
When you’ve done connecting Shields you can connect Smablo Development board to your computer with USB cable.
Example programs
To show you how to interact with Smablo Buzzzer Shield open Visual Studio Code and from your Smablo SDK example directory and open buzzer like it was shown at the video below:
Smablo prepared two demo projects to show you how to use Smablo Buzzer. To see how to use them open Visual Studio Code and Click file->Open folder and from your libsmablo/examples directory choose one of them just like it was shown on the videos below.
buzzer
The buzzer example will make sound after programming it. To compile and program the Shield press F5 button and hit the run button on the top menu of Visual Studio Code
buzzer_callback
The buzzer_callback example will make sound after programming it and will run the user defined callback function after the sound finish executing. To compile and program the Shield press F5 button and hit the run button on the top menu of Visual Studio Code.
Minimal code
Minimal example code will show you how to use Buzzer Shield.
//1
#include "drv_buzzer.h"
#include "sm_idle_task.h"

void buzzer_blocking_demo(void)
{
    ret_code_t err_code;

//2
//Firstly we need to initialize the buzzer frequency
    /**
        \brief Initialize buzzer driver as a blocking call.
        The first argument is Buzzer beep frequency in Hz.
        The second argument is  drv_buzzer_callback Beep sequence complete callback.
        Can be NULL if you don't want to use it.
    */
    err_code=drv_buzzer_init(1590,NULL);
    APP_ERROR_CHECK(err_code);

//3
//too buzz we are using the
    // buzz
    /**
        \brief Start beeping sequence, this is a non blocking call
        The first argument is number of beeps.
        The second argument is bepp duration in ms.
        The third argument is durattion of pause beetween beeps.
    */
    err_code=drv_buzzer_start(4,50,50);
    APP_ERROR_CHECK(err_code);

//4
    //wait for buzz sequence completion
    /**
        \brief The while loop check if drv_buzzer_start stopped executing
        and buisy wait function ::busy_wait function executing app_scheduler tasks if there are any
    */
    while(drv_buzzer_is_running()) sm_idle_task();

}
In the point 1 we need to include buzzer library to work use it.
In point 2 we are initializing the the buzzer with drv_buzzer_init function to work 1590 frequency.
In point 3 we are we are staring the sound with drv_buzzer_start function. This function need 3 arguments: thefirstv one is the number of beeps we want to play, secound one is beep duration in milisecounds and the last one is the time gap beetween the beeps.
In point 4 we are using while loop to check if the buzzer finish the beeping with drv_buzzer_is_running() and if so execute the scheduler tasks with sm_idle_task(). This helps to improve efficency of Smablo CPU.
How do I?
In these chapter we will show you some common things you can do with the Buzzer Shield.
Use buzzer with callback
This example shows how to use buzzer callback feature with drv_buzzer driver. The example has two functions buzzer_callback_demo() that initialize and start buzzer sound and the buzzer_callback() function that is a callback function which starts executing after the beeping is over.
//1
#include "drv_buzzer.h"
#include "sm_idle_task.h"
/**
    \brief Variable that helps us stop buzzing in test_buzzer_callback callback function
*/
uint8_t callback_fired=false;

//3
/**
 \brief drv_buzzer_init callback
       Will be called when the signal that the drv_buzzer_start(2,100,500); finished executing
*/
static void buzzer_callback(void)
{
    ret_code_t err_code;

    if(!callback_fired)
    {
        callback_fired=true;    ///< without it the buzzer will buzz forever

        /**
            \brief Buzz when finish
        */
        err_code=drv_buzzer_start(4,50,200);
        APP_ERROR_CHECK(err_code);
    }
}

//2
void buzzer_callback_demo(void)
{
    ret_code_t err_code;

    //use in non blocking fashion with callback
    /**
        \brief Initialaize buzzer with different frequency and callback
    */
    err_code=drv_buzzer_init(4000, buzzer_callback);
    APP_ERROR_CHECK(err_code);

    /**
        \brief Start beeping sequencewith new frequency
        This time there will be 2 beeps with
        100 ms duration and 100 ms pause beetween them
    */
    err_code=drv_buzzer_start(2,100,500);
    APP_ERROR_CHECK(err_code);

}
In point 1 we need to include the drv_buzzer library to use buzzer related functions.
In point 2 in buzzer_callback_demo() we are initializing the the the buzzer with drv_buzzer_init() function. The first parameter on the function sets the frequency of the sound in Hz and the second parameter is buzzer callback function that will be executed after the sound stops. Next like in Minimal code example we start the sound with drv_buzzer_start() function.
In point 3 after the sound stops the buzzer_callback() function is executed. In this function we are starting the new the new beeps.
drv_buzzer library reference
drv_buzzer_init
Prototype:
ret_code_t drv_buzzer_init(uint32_t beep_freq,drv_buzzer_callback_t drv_buzzer_callback);Function is used to initialize the sound frequency and add the callback function if needed. Function takes two parameters:
beep_freqtypeuint32_tthat sets the sound frequency in Hz.drv_buzzer_callbacktypedrv_buzzer_callback_tthat is a callback function that will execute afterdrv_buzzer_startstops executing. If callback feature is not needed can be NULL
To see the useage of the function see minimal code
drv_buzzer_start
Prototype:
ret_code_t drv_buzzer_start(uint16_t beeps_no, uint32_t beep_duration_ms, uint32_t pause_duration_ms);
Function is used for starting the sound sequence. Function takes 3 parameters
beeps_nonumber of beeps to playbeep_duration_mssingle beep duration in mspause_duration_mspause duration between beeps in ms
To see the useage of the function see minimal code
drv_buzzer_is_running
Prototype:
uint8_t drv_buzzer_is_running(void);Function is used to check if the buzzer is running. If the buzzer is running the function return the true value. Function can be used just like in the minimal code