Introduction
Smablo CPU board is the brain of the Smablo system. Smablo CPU is based on NRF52832 module that makes it small size, low power , efficient and powerful solution for most demanding applications. Smablo CPU is equipped with Bluetooth 5 Low Energy which makes it perfect for usecases such as beacons or variety of devices that use Bluetooth as a communication medium.
CPU Shield is also equipped with mma8652 accelerometer that you can use in your projects. mma8652 is a low-power, digital output 3-axis linear accelerometer with 8-bit or 12-bit data, high-pass filtered data, 8-bit or 12-bit configurable 32-sample FIFO with useful features like tap detection, motion detection, transient detection and portrait landscape detection.

Applications
Smablo CPU Shield can be used as a powerful microcontroller or advanced beacon.
- Internet of things
- Fitness/ sport
- Smart toys
- Military
- Wearables
- Smart home
- Low power network
- Education etc.
Getting started
To get started with Smablo CPU Shield you will need :
- Smablo Development Board
- Smablo CPU
- Smablo SDK
- Visual Studio Code
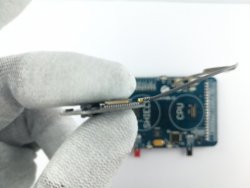
Take Smablo development board from your Smablo Development kit and place CPU on the described connector like in the pictures and video below:
[plugin:youtube]()
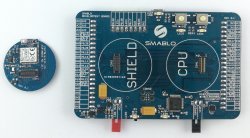 {.force-inline}
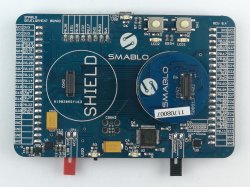 {.force-inline}
When you’ve done connecting Shield you can connect Smablo Development board to your computer with USB cable.
CPU CR
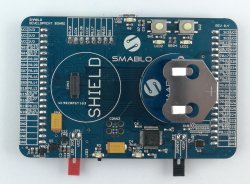
Some CPU Shield has also place for a CR battery that can power your project when you built for example Bluetooth beacons or use simple low power sensors. CPU Shield is also equipped mma8652 accelerometer.
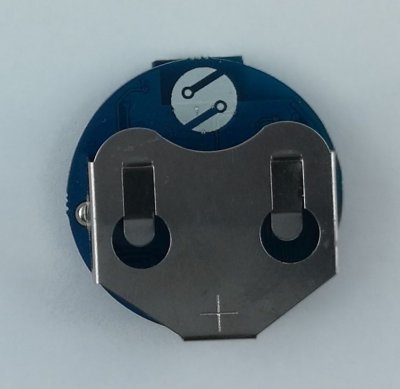
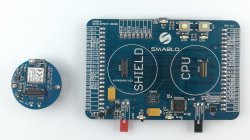
The getting started procedure is the same as in the normal CPU Shield and was shown on the pictures and video below.
[plugin:youtube]()
 {.force-inline}
 {.force-inline}
CPU External Anntena
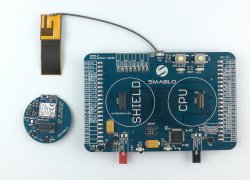
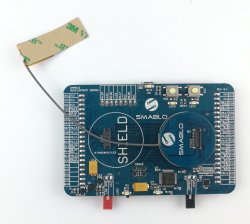
Some CPU Shield has also place for a CR battery and an external Bluetooth Antenna which is increasing Bluetooth working range and provides a solution for metal housing for the CPU Shield. This Shield is also equipped with is also equipped mma8652 accelerometer and an EEPROM memory.
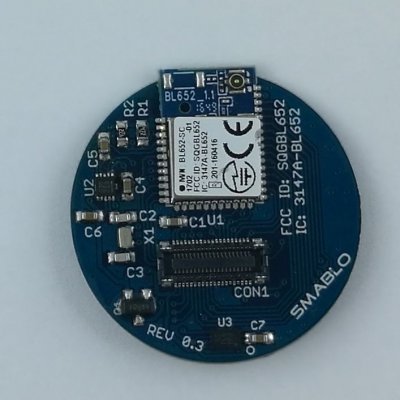
The getting started procedure is the same as in the normal CPU Shield and was shown on the pictures and video below.
[plugin:youtube]()
 {.force-inline}
 {.force-inline}
 {.force-inline}
Example programs
Smablo prepared five demo projects to show you how to use the accelerometer on Smablo CPU Shield. To see how to use run them open Visual Studio Code and Click file->Open folder and from your libsmablo/examples directory choose one of them just like it was shown on the videos below.
accelerometer_single_sample_interrupt
To see how to use accelerometer placed on Smablo CPU let’s open Visual Studio Code and Click file->Open folder and from your libsmablo/examples directory choose accelerometer_single_sample_interrupt demo code. In this example the accelerometer is working in the simple sample mode with 12,5 data rate so every time the interrupt occurs the single measurement data are printed on the screen. To see the results open RTT Viewer.
Open accelerometer_single_sample_interrupt demo code just like it was shown on the video below:
[plugin:youtube]()
To see how the
accelerometer_single_sample_interruptworks compile and run the project by pressing F5 button just like on the video below:
[plugin:youtube]()
And in the RTT Viewer window you should see all the measurements.
accelerometer_fifo_interrupt
To see how to use accelerometer placed on Smablo CPU let’s open Visual Studio Code and Click file->Open folder and from your libsmablo/examples directory choose accelerometer_fifo_interrupt demo code.
In this example the accelerometer is working in the simple sample mode with 800 Hz data rate and collecting data in circular buffer mode so every time the 31 samples are collected interrupt occurs and measurement data are printed on the screen. To see the results open RTT Viewer.
Open accelerometer_fifo_interrupt demo code just like it was shown on the video below:
[plugin:youtube]()
To see how the
accelerometer_fifo_interruptworks compile and run the project by pressing F5 button just like on the video below:
[plugin:youtube]()
And in the RTT Viewer window you should see all the measurements.
accelerometer_landport_detection
To see how to use accelerometer placed on Smablo CPU let’s open Visual Studio Code and Click file->Open folder and from your libsmablo/examples directory choose accelerometer_landport_detection demo code.
In this example the accelerometer is working in the landport detection mode so it is printing the orientation of the Shield on screen. To see the results open RTT Viewer.
Open accelerometer_landport_detection demo code just like it was shown on the video below:
[plugin:youtube]()
To see how the
accelerometer_landport_detectionworks compile and run the project by pressing F5 button just like on the video below:
[plugin:youtube]()
And in the RTT Viewer window you should see all the measurements.
Tap detection
To see how to use accelerometer placed on Smablo CPU let’s open Visual Studio Code and Click file->Open folder and from your libsmablo/examples directory choose accelerometer_pulse_detection demo code.
In this example the accelerometer is working in the tap or pulse detection mode when you tap the table near the shield the accelerometer will know that and print the event on the screen To see the results open RTT Viewer.
Open accelerometer_pulse_detection demo code just like it was shown on the video below:
[plugin:youtube]()
To see how the
accelerometer_pulse_detectionworks compile and run the project by pressing F5 button just like on the video below:
[plugin:youtube]()
And in the RTT Viewer window you should see all the measurements.(tap the table near the shield to get the measurements)
accelerometer_transient_detection
To see how to use accelerometer placed on Smablo CPU let’s open Visual Studio Code and Click file->Open folder and from your libsmablo/examples directory choose accelerometer_transient_detection demo code.
In this example the accelerometer is working in the transient detection mode when you will shake the Shield the accelerometer will know that and print the event on the screen To see the results open RTT Viewer.
Open accelerometer_transient_detection demo code just like it was shown on the video below:
[plugin:youtube]()
To see how the
accelerometer_transient_detectionworks compile and run the project by pressing F5 button just like on the video below:
[plugin:youtube]()
And in the RTT Viewer window you should see all the measurements.(shake the shield)
Minimal code
Minimal code example will show you how to program with Smablo Shields and drv_mma8652 library. You should always program you projects in this sequence. Function is polling the single sample acceleration data from the Shield every 100ms using timer.
#include "drv_mma8652.h"
#include "nrf_log.h"
#include "app_timer.h"

//MMA8652 driver instance
static mma8652_instance_t mma8652_instance=SM_MMA8652_INSTANCE_CREATE;

//Create a timer identifier
APP_TIMER_DEF(mma8652_polling_timer);

//timer handler for single sample polling example
static void accelerometer_data_polling_handler(void* p_ctx)
{
    ASSERT(p_ctx!=NULL);

    //derefernece the instance
    mma8652_instance_t* p_instance=(mma8652_instance_t*)p_ctx;

    //create the structure whre the data will be decoded
    mma8652_decoded_sample_t data;

    //read acceleration data
    mma8652_get_measurement_data_blocking(p_instance);

    //decode data from instance to data
    mma8652_decode_single_sample(p_instance, &data);

    char buff[100];

    //we have to use sprintf() because NRF_LOG_FLOAT forgets minus sign for floats in range (0,-1)
    sprintf(buff, "X:%f Y:%f Z:%f",data.X,data.Y,data.Z);
    NRF_LOG_RAW_DEBUG("%s\r\n",nrf_log_push(buff));

}

void example_func(void)
{
    //initialize the shield
    mma8652_init(&mma8652_instance, NULL, NULL);

    //configure measurement range to 4g
    mma8652_configure_measurement_range(&mma8652_instance,MMA8652_FS_RANGE_4G);

    //configure sample resolution to 12 bit
    mma8652_configure_sample_res(&mma8652_instance,MMA8652_RES_12BIT);

    //set low data rate suitable for polling
    mma8652_configure_active_mode(&mma8652_instance,MMA8652_ODR_12_5HZ,MMA8652_SMODS_NORMAL);

    //set part to active mode
    mma8652_configure_system_state(&mma8652_instance,MMA8652_ACTIVE);

    //write configuration to the part
    mma8652_commit_blocking(&mma8652_instance);

    //create and start timer that will poll accelerometer data
    ret_code_t err_code=app_timer_create(&mma8652_polling_timer,APP_TIMER_MODE_REPEATED,accelerometer_data_polling_handler);
    APP_ERROR_CHECK(err_code);

    //start the timer
    err_code=app_timer_start(mma8652_polling_timer,APP_TIMER_TICKS(100),&mma8652_instance);
    APP_ERROR_CHECK(err_code);
}
Basic code snippet shown above Basic code snippet is illustrating how you should program with Smablo drv_mma8865 library. Firstly we need to include all the libraries we will use in the example #include "drv_mma8652.h" #include "nrf_log.h" #include "app_timer.h".
If we want to use the accelerometer placed on the CPU Shield we need to create instance of it like it was done with static mma8652_instance_t mma8652_instance = SM_MMA8652_INSTANCE_CREATE;. The instance will hold all shield parameters and it’s changes which we can later send to the shield.
Then the shield need to be initialized with mma8652_init(&mma8652_instance, NULL, NULL); function. Initialization functions need to used only once at the beginning of the program just like it was shown in above Basic code snippet.
Next we can configure the shield to needed parameters thus:
mma8652_configure_measurement_range(&mma8652_instance,MMA8652_FS_RANGE_4G);function will configure the measurement range to 4g ,mma8652_configure_sample_res(&mma8652_instance,MMA8652_RES_12BIT);function will configure sample resolution to 12 bit ,mma8652_configure_active_mode(&mma8652_instance,MMA8652_ODR_12_5HZ,MMA8652_SMODS_NORMAL);function configure the 12,5 Hz sampling rate and normal power mode,mma8652_configure_system_state(&mma8652_instance,MMA8652_ACTIVE);function will turn the accelerometer to the active mode so the measurement can be performed.
When all configuration are done we have to use mma8652_commit_blocking(&mma8652_instance); function. This function will send the configuration done to instance to the accelerometer, after this function all the changes will be applied to the shield.
To get the measurement we will use timer that will call accelerometer_data_polling_handler handler function every 100 ms. If you want to now more about timer click here. accelerometer_data_polling_handler function is calling mma8652_get_measurement_data_blocking(p_instance) function which is reading the acceleration data from the Shield to the instance and mma8652_decode_single_sample(p_instance, &data);
Function decode data from instance to the data structure so we can easily show them on screen with NRF_LOG_RAW_DEBUG macros.
How do I?
1
drv_mma8652 driver reference
To make your work with Smablo products easier and faster we prepared drv_mma8652 library for use with Weather Shield. All of available functions and their descriptions can be found in drv_mma8652.h.
The functions in this library can be divided into 3 groups and to always expect proper work of the Smablo CPU Shield you should use them in this sequence:
- Initialization functions like
mma8652_init ()that should be used once at the beginning of your program, - Configuration functions like
mma8652_configure_measurement_range ()that will configure our shield, but remember it’s all they do, configure functions won’t change anything until we will use the next type of functions, - Get data function
mma8652_get_measurement_data_blocking ()functions that will read some data from the shield - Commit functions like
mma8652_commit_blocking()those functions will send all of the configurations made to shield. Only after executing this type of function you will see the change of behaviour of the accelerometer.
mma8652_decode_fifo_data
Prototype:
void mma8652_decode_fifo_data(const mma8652_instance_t* const p_instance, mma8652_decoded_fifo_t* const p_data);Function is used for decoding the FIFO data in to mma8652_decoded_fifo_t type data structure. Function takes 2 parameters:
p_instancetypemma8652_instance_twhich is accelerometer instance.p_datatypemma8652_decoded_fifo_tstructure to which the accelerometer data will be decoded
mma8652_decode_single_sample
Prototype:
void mma8652_decode_single_sample(const mma8652_instance_t* const p_instance, mma8652_decoded_sample_t* const p_data);Function is used for decoding the single sample data in to mma8652_decoded_sample_t type data structure. Function takes 2 parameters:
p_instancetypemma8652_instance_twhich is accelerometer instance.p_datatypemma8652_decoded_sample_tstructure to which the accelerometer data will be decoded
mma8652_init
Prototype:
void mma8652_init(mma8652_instance_t* const p_instance, mma8652_fifo_ctx_t* const p_fifo_ctx, mma8652_async_ctx_t* const p_async_ctx);Function is used for initializing the shield. Use it once at the beginning of our program like in code snippet above. Function takes 3 parameters:
p_instancetypemma8652_instance_twhich is accelerometer instance.p_fifo_ctxtypemma8652_fifo_ctx_tstructure which is required when we want to use FIFO otherwise can be NULLp_async_ctxtypemma8652_async_ctx_tstructure which is required when usingmma8652_get_measurement_data_asyncfunction otherwise can be NULL.
mma8652_reset
Prototype:
void mma8652_reset(mma8652_instance_t* const p_instance);Function is used for performing accelerometer reset to the datasheet default values. Function takes 1 parameter p_instance type mma8652_instance_t which is accelerometer instance to perform the reset on .
mma8652_commit_blocking
Prototype:
void mma8652_commit_blocking(mma8652_instance_t* const p_instance);Function is used for sending the instance configuration to the accelerometer in blocking manner. Function takes one parameter p_instance type mma8652_instance_t which is accelerometer instance that we want to send to the accelerometer.
mma8652_get_measurement_data_blocking
Prototype:
void mma8652_get_measurement_data_blocking(mma8652_instance_t* const p_instance);Function is used for performing the measurement or accelerometer data in blocking manner. Function takes 1 parameter p_instance type mma8652_instance_t which is accelerometer instance that we want update the measurements.
mma8652_get_measurement_data_async
Prototype:
void mma8652_get_measurement_data_async(mma8652_instance_t* const p_instance, const mma8652_interrupt_handler_t handler, const mma8652_twi_error_handler_t error_handler);Function is used for performing the measurement or accelerometer data in asynchronous manner. Function takes 3 parameters:
p_instancetypemma8652_instance_twhich is accelerometer instance that we want update the measurementshandlertypemma8652_interrupt_handler_thandler which is user defined function that will execute after reading all of the measurements is complete.error_handlertypemma8652_twi_error_handler_tfunction which is user defined function that will execute if an error will occur while updating the measurements. Can be NULL if the function is not wanted.
mma8652_configure_fifo
Prototype:
void mma8652_configure_fifo(mma8652_instance_t* const p_instance, const mma8652_fifo_cfg_t* const p_fifo_cfg);Function is used for configuring the FIFO. Function takes 2 parameters:
p_instancetypemma8652_instance_twhich is accelerometer instance that we want to configure the FIFO- populated
p_fifo_cfgtypemma8652_fifo_cfg_tstructure which we want to configure the structure with .
mma8652_configure_measurement_range
Prototype:
void mma8652_configure_measurement_range(mma8652_instance_t* const p_instance, const mma8652_xyz_data_fs_state_t range);Function is used for configure accelerometer measurement range for more information see page 13 in mma8652 datasheet. Function takes 2 parameters:
p_instancetypemma8652_instance_twhich is accelerometer instance that we want to configure the rangerangetypemma8652_xyz_data_fs_state_tparameter which determines the range of the accelerometer.
When the full-scale is set to ±2 g, the measurement range is –2 g to +1.999 g, and each count corresponds to (1/1024) g (0.98 mg) at 12-bit resolution.
When the full-scale is set to ±4 g, the measurement range is –4 g to +3.998 g, and each count corresponds to (1/512) g (1.96 mg) at 12-bit resolution.
When the full-scale is set to ±8 g, the measurement range is –8 g to +7.996 g, and each count corresponds to (1/256) g (3.9 mg) at 12-bit resolution.
If only the 8-bit results are used, then the resolution is reduced by a factor of 16.
mma8652_configure_hp_filter
Prototype:
void mma8652_configure_hp_filter(mma8652_instance_t* const p_instance, const mma8652_xyz_data_hpf_out_state_t hp_state, const mma8652_reg_hp_filter_cutoff_value_t hp_value);Function is used for configuration of the accelerometer high pass filter. Function takes 3 parameters:
p_instancetypemma8652_instance_twhich is accelerometer instance that we want to configure the hp filterhp_statetypemma8652_xyz_data_hpf_out_state_tparameter which turns the filter on or offhp_valuetypemma8652_reg_hp_filter_cutoff_value_tparameter which determines the value of hp filter.
Those values also depend on oversampling mode and sampling rate, see table 33 in the datasheet ! Mode names selected according to 800Hz sampling in normal operating mode
mma8652_configure_int_enables
Prototype:
void mma8652_configure_int_enables(mma8652_instance_t* const p_instance, const mma8652_reg_ctrl_reg4_t* const p_int_enable);Function is used for configuration the interrupts form which features are enable when using interrupts. Function takes 2 parameters:
p_instancetypemma8652_instance_twhich is accelerometer instance that we want to configure the interrupts- populated
p_int_enabletypemma8652_reg_ctrl_reg4_tstructure which determines the interrupts are enabled.
By default all interrupts are disable. For more information see 56 page of the datasheet.
mma8652_configure_int_pins
Prototype:
void mma8652_configure_int_pins(mma8652_instance_t* const p_instance, const mma8652_reg_ctrl_reg5_t* const p_int_pins);Function is used for configuration the interrupt pin that the features will set an interrupt to. Function takes 2 parameters:
p_instancetypemma8652_instance_twhich is accelerometer instance that we want to configure the interrupt pin.- populated
p_int_pinstypemma8652_reg_ctrl_reg5_tstructure which determines which feature set the interrupt on which pin.
By default all features set the interrupt on INT2 pin
mma8652_configure_system_state
Prototype:
void mma8652_configure_system_state(mma8652_instance_t* const p_instance, const mma8652_state_t system_state);Function is used for configuration of the state of the accelerometer. Function takes 2 parameters:
p_instancetypemma8652_instance_twhich is accelerometer instance that we want to configure the statesystem_statetypemma8652_state_tparameter which determines the state of the accelerometer.
By default the accelerometer is in the MMA8652_STANDBY state and to perform any measurements the state should be changed to MMA8652_ACTIVE
mma8652_configure_sample_res
Prototype:
void mma8652_configure_sample_res(mma8652_instance_t* const p_instance, const mma8652_f_read_state_t res);Function is used for configuring the sample 8bit or 12 bit resolution. Function takes 2 parameters:
p_instancetypemma8652_instance_twhich is accelerometer instance that we want to configure the resolution.restypemma8652_f_read_state_tparameter that determines the sample resolution.
mma8652_configure_active_mode
Prototype:
void mma8652_configure_active_mode(mma8652_instance_t* const p_instance, const mma8652_odr_state_t active_data_rate, const mma8652_smods_state_t active_sampling_mode);Function is used for configuring the sampling parameters in active mode. Function takes 3 parameters:
p_instancetypemma8652_instance_twhich is accelerometer instance that we want to configure sampling parametersactive_data_ratetypemma8652_odr_state_tparameter which determines the sampling rate of the rate of the accelerometer.active_sampling_modetypemma8652_smods_state_tparameter which determines the oversampling modes.
mma8652_configure_sleep_mode
Prototype:
void mma8652_configure_sleep_mode(mma8652_instance_t* const p_instance, const mma8652_sleep_cfg_t* const p_sleep_cfg);Function is used for configuration of the sleep mode parameters. Function takes 2 parameters:
p_instancetypemma8652_instance_twhich is accelerometer instance that we want to configure the sleep modep_sleep_cfgtypemma8652_sleep_cfg_tstructure that determines the parameters for the sleep mode.
mma8652_configure_ff_mt_detection
Prototype:
void mma8652_configure_ff_mt_detection(mma8652_instance_t* const p_instance, const mma8652_ff_mt_cfg_t* const p_ff_mt_cfg);Function is used for configuring motion detection and free fall features. This function uses sampling parameters configured in instance struct to convert debounce times to counts. In case you wish to customize sampling make sure that call to
mma8652_configure_active_mode()is made before calling this function.
Function takes 2 parameters:
p_instancetypemma8652_instance_twhich is accelerometer instance that we want to configure the free fall and motion detectionp_ff_mt_cfgtypemma8652_ff_mt_cfg_tstructure that determines parameters for the free fall or motion detection
mma8652_configure_transient_detection
Prototype:
void mma8652_configure_transient_detection(mma8652_instance_t* const p_instance, const mma8652_transient_cfg_t* const p_transient_cfg);Function is used for configuring transient detection feature. This function uses sampling parameters configured in instance struct to convert debounce times to counts. In case you wish to customize sampling make sure that call to
mma8652_configure_active_mode()is made before calling this function.
Function takes 2 parameters:
p_instancetypemma8652_instance_twhich is accelerometer instance that we want to configure the transient detectionp_transient_cfgtypemma8652_transient_cfg_tstructure that determines parameters for the transient detection
mma8652_configure_pulse_detection
Prototype:
void mma8652_configure_pulse_detection(mma8652_instance_t* const p_instance, const mma8652_pulse_cfg_t* const p_pulse_cfg);Function is used for configuring pulse detection feature. This function uses sampling parameters configured in instance struct to convert debounce times to counts. In case you wish to customize sampling make sure that call to
mma8652_configure_active_mode()is made before calling this function.
Function takes 2 parameters:
p_instancetypemma8652_instance_twhich is accelerometer instance that we want to configure the pulse detectionp_pulse_cfgtypemma8652_pulse_cfg_tstructure that determines parameters for pulse detection
mma8652_configure_pl_detection
Prototype:
void mma8652_configure_pl_detection(mma8652_instance_t* const p_instance, const mma8652_pl_cfg_t* const p_pl_cfg);Function is used for configuring portrait/landscape detection feature. This function uses sampling parameters configured in instance struct to convert debounce times to counts. In case you wish to customize sampling make sure that call to [
mma8652_configure_active_mode()](#mma8652-configure-active-mode is made before calling this function.
Function takes 2 parameters:
p_instancetypemma8652_instance_twhich is accelerometer instance that we want to configure the portrait/landscape detectionp_pl_cfgtypemma8652_pl_cfg_tstructure that determines parameters for portrait/landscape detection
mma8652_attach_interrupt_handler
Prototype:
void mma8652_attach_interrupt_handler(mma8652_instance_t* const p_instance, const mma8652_ctrl_int_pin_state_t int_line, const mma8652_interrupt_handler_t handler, const mma8652_interrupt_action_t int_action);Function is used for attaching user defined handler to interrupt line and action which should be taken before handler executes. Function takes 4 parameters:
p_instancetypemma8652_instance_twhich is accelerometer instance that we want to attach the interruptint_linetypemma8652_ctrl_int_pin_state_tparameter which determines the interrupt pin to attach the handler tohandlertypemma8652_interrupt_handler_tuser handler function that will be executed after interrupt action selected inint_actionint_actiontypemma8652_interrupt_action_tparameter which determines what action will be taken after interrupt occurs.
mma8652_detach_interrupt_handler
Prototype:
void mma8652_detach_interrupt_handler(mma8652_instance_t* const p_instance, const mma8652_ctrl_int_pin_state_t int_line);Function is used for detaching user defined interrupt handler from given interrupt. Function takes 2 parameters:
p_instancetypemma8652_instance_twhich is accelerometer instance that we want to dettach the interruptint_linetypemma8652_ctrl_int_pin_state_tparameter which determines the interrupt pin to detach the handler from
Advanced
Fifo structure
When using FIFO you need to use populated mma8652_fifo_cfg_t structure. Structure includes parameters such as:
fifo_modetypemma8652_f_mode_state_tparameter which is the mode we want to use FIFO. FIFO Is disabled by defaultfifo_watermarktypeuint8_tvalue from range (0-32) which is buffer configurable watermark, allowing the processor to be triggered after a configurable number of samples has filled in the bufferfifo_triggerstypemma8652_reg_trig_cfgparameter that configures which interrupt(s) may trigger the FIFO. (0 by default)fifo_gate_state typemma8652_ctrl_fifo_gate_state_tparameter which configures the FIFO gate. By default FIFO gate is inMMA8652_FIFO_GATE_BYPASSstate
For more information see the mma8652 datasheet
Auto Sleep structure
The MMA8652FC can be configured to transition between sample rates (with their respective current consumption) based on four of the interrupt functions of the device. The advantage of using the Auto-WAKE/SLEEP is that the system can automatically transition to a higher sample rate (higher current consumption) when needed, but spends the majority of the time in the SLEEP mode (lower current) when the device does not require higher sampling rates. The Interrupts that can WAKE the device from SLEEP are the following: Tap Detection, Orientation Detection, Motion/Freefall, and Transient Detection. When sleep mode is being used the mma8652_sleep_cfg_t type structure must be created and configurated:
auto_sleep_statetypemma8652_auto_sleep_state_tparameter that enables or disables auto sleep modesleep_data_ratetypemma8652_aslp_rate_state_tparameter that determines the output data rate in the sleep modesleep_sampling_modetypemma8652_smods_state_tparameter that determines the oversampling rate in the sleep modesleep_mode_delaytypeuint8_tvalue which determines how long part should be idle before entering sleep. Consult datasheet table 91.wake_srctypemma8652_wake_sources_tstructure which determines wake sources. Consult datasheet table 92.
Two interrupt pins
MMA8652 has 2 interrupt pins available to work int1 and int2. By default all features are configured to set an interrupt on the INT2 pin. Remember that if you want to use interrupt from any feature you need to enable the interrupt from this feature with mma8652_configure_int_enables() function.
Oversampling modes 5.4
The highest resolution is achieved at 1.56 Hz.
There is a trade-off between low power and high resolution. Low power can be achieved when the oversampling rate is reduced. When MODS = 11 the lowest power is achieved. The lowest power is achieved when the sample rate is set to 1.56 Hz.
Motion detection and freefall
Motion detection and freefall type structure parameters :
detection_modetypemma8652_ff_cfg_oae_state_tparameter which determine freefall or motion detercion mode to setevent_latch_modetypemma8652_ff_cfg_ele_state_tparameter which enables or disables event latchdebounce_modetypemma8652_ff_mt_ths_dbcntm_state_tparameter that select the debounce counter modedetection_tresholdtype float value determines threshold resolution, the threshold register has a range of 0 to 127 counts. The maximum range 127 is to ±8 g.debounce_value_mstypeuint32_tvalue sets the minimum number of debounce sample counts that continuously match the detection condition selected by you for the freefall/motion eventX,Y,Ztypeaxis_detection_enableparameter that enables or disables the freefall or motion detection for x, y or z axis
Transient detection
Transient detection structure parameters:
event_latch_modetypemma8652_transient_cfg_ele_state_tparameter which enables or disables event latchdebounce_modetypemma8652_transient_ths_dbcntm_state_tparameter that select the debounce counter modehf_bypass_modetypemma8652_transient_cfg_hf_byp_state_tparameter that enables or disables high pass filter bypass mode. Disabling the bypass filter makes this feature similar to motion detection, more information in the mma8652 datasheet.detection_tresholdtypefloatvalue determines threshold value which corresponds to a g value, which is compared against the values of high-pass filtered data. If the highpass filtered acceleration value exceeds the threshold limit, an event flag is raised and the interrupt is generated (if enabled).debounce_value_mstypeuint32_tvalue sets the minimum number of debounce counts continuously matching the condition where the unsigned value of high-pass filtered data is greater than the user-specified value of detection_tresholdX,Y,Ztypemma8652_transient_cfg_event_state_tparameter that enables or disables the transient detection for x, y or z axis
Pulse detection
Pulse detection configuration parameters for more information see the mma8652 datasheet:
event_latch_modetypemma8652_pulse_cfg_ele_state_tparameter which enables or disables event latchdpa_modetypemma8652_pulse_cfg_dpa_state_t parameterwhich enables or disables the double pulse abort modelpf_statetypemma8652_reg_hp_filter_cutoff_lpf_state_tparameter which enables or disables low pass filter for pulse eventshpf_byp_statetypemma8652_reg_hp_filter_cutoff_hpf_state_tparameter which turns on or off high pass filter bypass filter modepulse_tmlt_mstypeuint32_tvalue which determines maximum time between start and end of the pulse. For possible settings range consult datasheet table 79 and 80pulse_ltcy_mstypeuint32_tvalue which determines time after each pulse when new pulse events are ignored. For possible settings range consult datasheet table 83 and 84pulse_wnd_mstypeuint32_tvalue which determines in double tap detection time after latency period in which second tap must begin. For possible settings range consult datasheet table 87 and 88.X,Y,Ztype float axis detection thresholds, the threshold values range from 1 to 127 up to 8gX,Y,Ztypemma8652_pulse_cfg_event_state_tparameter that enables or disables pulswe detection for single tap X, Y, ZX,Y,Ztypemma8652_pulse_cfg_event_state_tparameter that enables or disables pulswe detection for double tap X, Y, Z