Introduction
Smablo PM Sensor is based on Honeywell particle sensor that can detect and count particles in the concentration range of 0 µq/m3 to 1,000 µq/m3 . As an output Smablo PM Shields gives comcentration of PM 2,5 and approximated PM 10 concentration. Sensor is compilant with RoHS directive and REACH
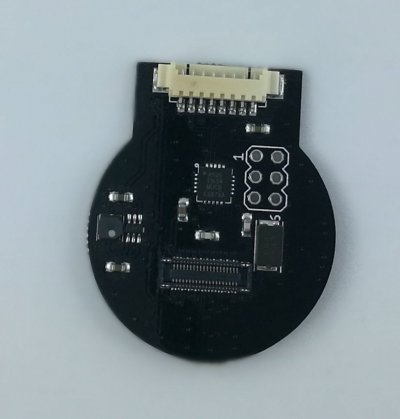 {.force-inline}
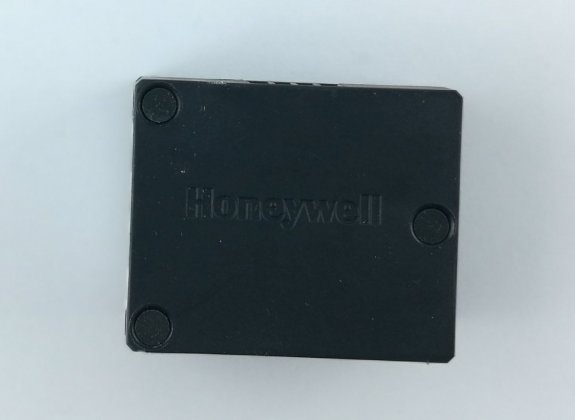 {.force-inline}
 {.force-inline}
Applications
Smablo PM Sensor can be used in HVAC application and consumer products to detect PM2,5 and PM10 concentration. Typical application:
- HVAC:
- Air conditioners
- Air quality monitors
- Environmental monitoring
- Consumer products:
- Air cleaners
- Air conditioners
- Air purifiers
- Car air cleaners
- Handheld air quality detectors
Getting started
To get started with Smablo Top LED and button shield you will need :
- Smablo Development Board
- Smablo PM Shield, cable and Honeywell Sensor
- Smablo CPU
- Smablo SDK
- Visual Studio Code
Take Smablo PM Shield and connect with Honeywell sensor with cable and then take Smablo Development Board from your Smablo Development kit and place CPU and Smablo PM Sensor on the Smablo Bridge Board on the described connectors like in the pictures and video below:
[plugin:youtube]()
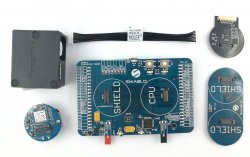 {.force-inline}
 {.force-inline}
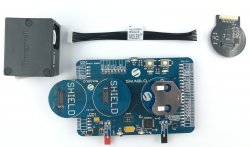 {.force-inline}
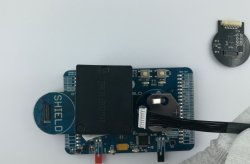 {.force-inline}
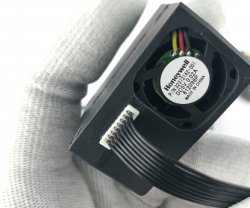 {.force-inline}
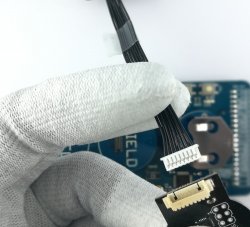 {.force-inline}
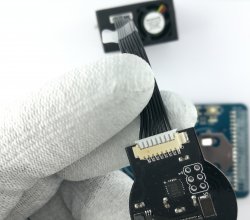 {.force-inline}
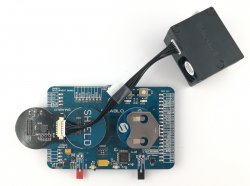 {.force-inline}
Example programs
To show you how to interact with Smablo PM Shield open Visual Studio and from the Smablo SDK directory open smog_sensor example just like in the video below:
[plugin:youtube]()
To see how the smog_sensor_demo_main() example works compile and program CPU Shield using F5 button just like it was shown in the video below:
[plugin:youtube]()
As you can see in te RTT Viewer window smog_sensor example shows concentration of the PM 2,5 and PM 10.
Minimal code
Minimal code will show you how to program with Smablo Shields and drv_hpm115 library.
#include "drv_hpm115.h"
#include "nrf_log.h"

static hpm115_instance_t hpm115_instance=SM_HPM115_INSTANCE;

void example_func(void)
{
    //initialize the shield
    hpm115_init(&hpm115_instance);
    //turn on the sensor
    hpm115_set_power_state(&hpm115_instance, HPM115_POWER_ON);
    //read data form sensor to meas_data structure
    hpm115_measurement_data_t meas_data;
    hpm115_read_data(&hpm115_instance, &meas_data);
    //print values on screen
    NRF_LOG_DEBUG("PM25: %u, PM10:%u\r\n",meas_data.pm25, meas_data.pm10);
}
Minimal code snippet shown above Basic code snippet is illustrating how you should program with Smablo drv_hpm115 library. Firstly we need to include the library just like it was done in the line one of the snippet. Now we can use all of the functions from the drv_hpm115 library.
Then we need to create the instance of the shield like it was done with static hpm115_instance_t hpm115_instance=SM_HPM115_INSTANCE; our instance will hold all of the shield parameters which we will change and send to the shield. In the example_func() first thing to do is initialization of the shield with hpm115_init() function.
After initialization we need to turn on the Honeywell sensor with hpm115_set_power_state() function.
Now we are ready to read the data from the sensor, reading the values is accomplished with hpm115_read_data() function. To use this function we need to create hpm115_measurement_data_t data type structure like in the example above in which we will hold read values of PM 2,5 and PM10 concentration. Then we can print the data on the screen with NRF_LOG_DEBUG macro.
How do I?
Read data from sensor every 1 s
#include "smog_sensor_demo.h"
#include "drv_hpm115.h"
#include "nrf_log.h"
#include "sm_timer.h"

//Create instance of the PM Sensor
static hpm115_instance_t hpm115_instance=SM_HPM115_INSTANCE;

SM_TIMER_DEF(pm_timer);

//this handler will execute every 1 s
static void pm_timer_handler(void* p_ctx)
{
    //Read the data from the sensor
    hpm115_measurement_data_t meas_data;
    hpm115_read_data(&hpm115_instance, &meas_data);

    //print data on screen
    NRF_LOG_DEBUG("PM25: %u, PM10:%u\r\n",meas_data.pm25, meas_data.pm10);

}

void pm_sensor_demo(void)
{
    //initialize PM Sensor driver
    hpm115_init(&hpm115_instance);

    //Turn the sensor on
    hpm115_set_power_state(&hpm115_instance, HPM115_POWER_ON);

    //create timer timer that will read the values from the sensor every 1 s
    ret_code_t err_code;
    err_code=sm_timer_create(&pm_timer, SM_TIMER_MODE_REPEATED, pm_timer_handler);
    APP_ERROR_CHECK(err_code);

    //start pm_timer timer
    err_code=sm_timer_start(pm_timer, SM_TIMER_TICKS(1000), NULL);
    APP_ERROR_CHECK(err_code);

}
The demo code above will read PM2,5 and PM 10 concentration from PM Sensor every 1s using timer and then print tchem on screen.
If you want to know more about timer click here .
Get the measurement every time they are ready
#include "drv_hpm115.h"
#include "nrf_log.h"

//Create instance of the PM Sensor
static hpm115_instance_t hpm115_instance=SM_HPM115_INSTANCE;

//this handler will execute every time the measurments are ready to read
static void hpm115_int_handler(hpm115_instance_t* const p_instance)
{
    //Read the data from the sensor
    hpm115_measurement_data_t meas_data;
    hpm115_read_data(&hpm115_instance, &meas_data);

    //print data on screen
    NRF_LOG_DEBUG("PM25: %u, PM10:%u\r\n",meas_data.pm25, meas_data.pm10);
}

void pm_sensor_demo(void)
{
    //initialize PM Sensor driver
    hpm115_init(&hpm115_instance);

    //Turn the sensor on
    hpm115_set_power_state(&hpm115_instance, HPM115_POWER_ON);

    //attach interrupt to PM Sensor
    //every time the measurements are ready to read the interrupt will occur
    hpm115_attach_interrupt(&hpm115_instance, hpm115_int_handler);

}
The example code above shows you how to use interrupt driven reading from sensor. In other words example will print the values of PM 2,5 and PM10 every time sensor read new value.
hpm115 library reference
To make your work with Smablo products easier and faster we prepared hpm115 library for use with PM Sensor module. All of available functions and their descriptions can be found in hpm115.h.
hpm115_init
Prototype:
void hpm115_init(hpm115_instance_t* const p_instance)Function is used for initializing the PM Sensor Shield. You should always use it ate the beginning of your program like it was shown at the in demo examples above. Function takes one parameter which is pointer to hpm115_instance_t type instance.
hpm115_set_power_state
Prototype:
void hpm115_set_power_state(hpm115_instance_t* const p_instance, hpm115_power_state_t power_state)Function is used for turning on or off the PM Sensor. At default the shield is off. Function takes 2 parameters :
p_instancetypehpm115_instance_twhich is pointer to PM Sensor instance.power_statetypehpm115_power_state_twhich is the desired state off the shield. State of the shield can be tuned on withHPM115_POWER_ONor turned off withHPM115_POWER_OFF.
hpm115_read_data
Prototype:
void hpm115_read_data(const hpm115_instance_t* const p_instance, hpm115_measurement_data_t* const p_meas_data)Function is used for reading the PM 2,5 and PM 10 concentration values from the PM Sensor. Function takes 2 parameters :
p_instancetypehpm115_instance_twhich is pointer to PM Sensor instance.p_meas_datawhich is pointer tohpm115_measurement_data_ttype data structure which we need to create earlier in the code and where the PM data will be read to.
hpm115_attach_interrupt
Prototype:
void hpm115_attach_interrupt(hpm115_instance_t* const p_instance, hpm_interrupt_handler_t int_handler)Function is used for attaching the interrupt to the PM Sensor. Every time the PM data will be ready to read the Sensor will execute user defined handler that for example read the data from the sensor. Function takes 2 parameters:
p_instancetypehpm115_instance_twhich is pointer to PM Sensor instance.int_handleruser defined interrupt handler typehpm115_instance_t.
hpm115_detach_interrupt
Prototype:
void hpm115_detach_interrupt(hpm115_instance_t* const p_instance)Function is used for detaching is used for detaching user defined handler. Function takes 1 parameter, p_instance type hpm115_instance_t which is pointer to PM Sensor instance.
Advanced
PM Sensor
Worth mentioning is that PM10 in µg/m3 is calculated from PM 2.5 readings with producer algorithm. Life of Honeywell sensor is 20,000 hours of continuous use. Sensor response time is less then 6s. After power up sensor need to work for some time to avoid false sensor reading caused dust concentration in the sensor measuring canal