Introduction
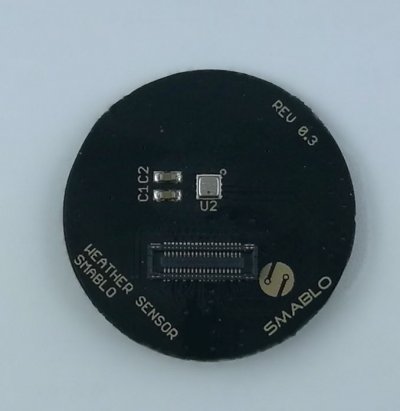
Weather Sensor is a digital sensor which allows you to read environmental temperature, outdoor air pressure and humidity with very low power consumption. The sensor is based on Bosh BME280 and ensure long term stability and high EMC robustness with long term operating even on battery.
Applications
Weather module can be used indoors or outdoors, depending on business needs. It’s typical applications:
- Context awareness, e.g. skin detection, room change detection
- Fitness monitoring / well-being
- Warning regarding dryness or high temperatures
- Measurement of volume and air flow
- Home automation control
- control heating, venting, air conditioning (HVAC)
- Internet of things
- GPS enhancement (e.g. time-to-first-fix improvement, dead reckoning, slope detection)
- Indoor navigation (change of floor detection, elevator detection)
- Outdoor navigation, leisure and sports applications
- Weather forecast
- Vertical velocity indication (rise/sink speed)
Getting started
To get started with Smablo weather sensor you will need :
- Smablo Development Board
- Weather Shield
- Smablo CPU
- Smablo SDK
- Visual Studio Code
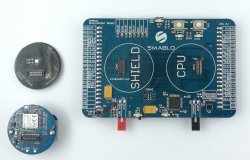
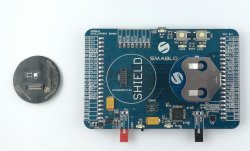
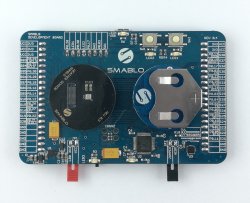
From Smablo development kit take Smablo CPU Shield and place it on Smablo Development board and do the same with Smablo Weather Shield just as you can see on the video below.
[plugin:youtube]()
 {.force-inline}
 {.force-inline}
 {.force-inline}
When you’ve done connecting Shields you can connect Smablo Development board to your computer with USB cable.
Example programs
Smablo prepared four demo projects to show you how to use Smablo Weather Sensor. To see how to use run them open Visual Studio Code and Click file->Open folder and from your libsmablo/examples directory choose one of them just like it was shown on the videos below.
Weahter_normal_no_filter
To see how to use Smablo Weather Sensor let’s open Visual Studio Code and Click file->Open folder and from your libsmablo/examples directory choose weather_normal_mode_no_filter demo code. Example will measure humidity, temperature and air pressure in no filter mode and then print the result on screen every 500 ms. To see the results open RTT Viewer.
Open weather_normal_mode_no_filter demo code just like it was shown on the video below:
[plugin:youtube]()
To see how the weather_normal_mode_no_filter works compile and run the project by pressing F5 button just like on the video below:
[plugin:youtube]()
And in the RTT Viewer window you should see all the measurements.
Weather_normal_filter
To see how to use Smablo Weather Sensor let’s open Visual Studio Code and Click file->Open folder and from your libsmablo/examples directory choose weather_normal_mode_filter demo code. Example will measure humidity, temperature and air pressure in filter mode and then print the results on screen every 500 ms. To see the results open RTT Viewer.
Open weather_normal_mode_filter demo code just like it was shown on the video below:
[plugin:youtube]()
To see how the weather_normal_mode_filter works compile and run the project by pressing F5 button just like on the video below:
[plugin:youtube]()
And in the RTT Viewer window you should see all the measurements.
Weather_forced
To see how to use Smablo Weather Sensor let’s open Visual Studio Code and Click file->Open folder and from your libsmablo/examples directory choose weather_forced demo code. Example will measure humidity, temperature and air pressure in filter mode and then print the results on screen every 500 ms. To see the results open RTT Viewer.
Open weather_forced demo code just like it was shown on the video below:
[plugin:youtube]()
To see how the weather_forced works compile and run the project by pressing F5 button just like on the video below:
[plugin:youtube]()
And in the RTT Viewer window you should see all the measurements.
Weather_async
To see how to use Smablo Weather Sensor let’s open Visual Studio Code and Click file->Open folder and from your libsmablo/examples directory choose weather_async demo code. Example will measure humidity, temperature and air pressure in filter mode and then print the results on screen every 500 ms. To see the results open RTT Viewer.
Open weather_async demo code just like it was shown on the video below:
[plugin:youtube]()
To see how the weather_async works compile and run the project by pressing F5 button just like on the video below:
[plugin:youtube]()
And in the RTT Viewer window you should see all the measurements.
Minimal code
Basic example code will show you how to program with Smablo Shields and drv_bme280 library. You should always program you projects in this sequence.
#include "nrf_log.h"
#include "nrf_delay.h"
#include "drv_bme280.h"

//create instance of weather shield
static bme280_instance_t bme280_instance=SM_BME280_INSTANCE;

void example_func(void)
{

    //Initialize Weather Shield
    bme280_init(&bme280_instance);

    //select which data we want to measure
    bme280_sampling_cfg_t measurements =
    {
        .temp_sampling=BME280_OVS_1X,
        .hum_sampling=BME280_OVS_1X,
        .press_sampling=BME280_OVS_1X
    };

    //configure Weather Shield with measurements structure
    bme280_configure_sampling(&bme280_instance,&measurements);

    //Send our configurations to the Smablo Weather Shield
    bme280_commit_blocking(&bme280_instance);

    //trigger single measurement
    bme280_trigger_sampling_blocking(&bme280_instance);

     //wait for measurement to complete
    nrf_delay_ms(10);

    //get the meausremnnts
    bme280_get_measurement_data_blocking(&bme280_instance);

    //decode raw measurments to floats data
    bme280_measurement_data_t data;
    bme280_decode_measurement_data(&bme280_instance, &data);

    //print data on screen
    NRF_LOG_RAW_DEBUG("T: "NRF_LOG_FLOAT_MARKER" degC. H:"NRF_LOG_FLOAT_MARKER"Rh",
                      NRF_LOG_FLOAT(data.temperature), NRF_LOG_FLOAT(data.humidity));

    NRF_LOG_RAW_DEBUG("  P:"NRF_LOG_FLOAT_MARKER"Pa\r\n", NRF_LOG_FLOAT(data.pressure));
}
Basic code snippet shown in Minimal code Basic code snippet is illustrating how you should program with Smablo drv_bme280 library. Firstly we need to include the library just like it was done above. Now we can use all of the functions from the drv_bme280 library.
First we need to create an instance of the shield. We can do that with static bme280_instance_t bme280_instance=SM_BME280_INSTANCE; bme280_instance will hold all shield parameters and it’s changes which we can later send to the shield.
Then we need to initialize the Weather Shield, to do that we need to use bme280_init(&bme280_instance); Initialization functions need to used only once at the beginning of the program just like it was shown in Minimal code Basic code snippet.
Next we are choosing which measurements we want from the shield and we can do that by creating bme280_sampling_cfg_t type structure. From Weather Shield we can get temperature, humidity and pressure and we can set the oversampling of each of the measurements. In our example function we will get all of the data with minimum oversampling rate. If we wanted for example to get only pressure data we would set only .press_sampling=BME280_OVS_1X and skip the rest. We need to configure our instance with our measurements structure by using bme280_configure_sampling(&bme280_instance, &measurements);
Then to configuration take place we need to send them to the Weather Shield and we can do that with bme280_commit_blocking(&bme280_instance); . After this all of the changes will be applied to the shield.
bme280_trigger_sampling_blocking(&bme280_instance); function will trigger a single measurement of the temperature, pressure, and humidity. After triggering the measurement we need to wait around 10 ms with nrf_delay_ms(10); before reading the measurement from the shield with bme280_get_measurement_data_blocking(&bme280_instance);.
Now the measurement are as a raw data are available in the instance and to decode them to float format we can use
bme280_decode_measurement_data(&bme280_instance, &data); function which will decode them to the data structure. At the end we are printing the measurements on screen with NRF_LOG_RAW_DEBUG macros. You can see the result of the measurement open RTT Viewer.
How do I?
Measure only pressure
#include "nrf_log.h"
#include "nrf_delay.h"
#include "drv_bme280.h"

//create instance of weather shield
static bme280_instance_t bme280_instance=SM_BME280_INSTANCE;

void example_func(void)
{
    //Initialize Weather Shield
    bme280_init(&bme280_instance);

    //select pressure oversamping to get the pressure data
    bme280_sampling_cfg_t measurements;
    measurements.press_sampling = BME280_OVS_1X;

    //configure Weather Shield with measurements structure
    bme280_configure_sampling(&bme280_instance,&measurements);

    //Send our configurations to the Smablo Weather Shield
    bme280_commit_blocking(&bme280_instance);

    //trigger one measurement
    bme280_trigger_sampling_blocking(&bme280_instance);

    //wait for measurement to complete
    nrf_delay_ms(36);

    //get the measurements
    bme280_get_measurement_data_blocking(&bme280_instance);

    //decode raw measurements to floats data
    bme280_measurement_data_t data;
    bme280_decode_measurement_data(&bme280_instance, &data);

    //print decoded measurements
    NRF_LOG_RAW_DEBUG("P:"NRF_LOG_FLOAT_MARKER"Pa\r\n", NRF_LOG_FLOAT(data.pressure));
}
Example above makes single measurement of pressure. To measure temperature or humidity add measurements.temp_sampling or measurements.hum_sampling and set their oversampling rate. This example is working in the forced mode(default). Which means we need to trigger the measurement, wait and read the measurements from the shield and decode it to use.
Measure using autosampling
#include "drv_bme280.h"
#include "nrf_log.h"
#include "app_timer.h"

//timer definition
APP_TIMER_DEF(weather_timer);
//create instance of weather shield
static bme280_instance_t bme280_instance=SM_BME280_INSTANCE;

void weather_handler(void *p_ctx)
{
    //Dereference instance pointer. Make it instance type from void ctx.
    bme280_instance_t* const p_instance=(bme280_instance_t*)p_ctx;

    //get the meausremnnts
    bme280_get_measurement_data_blocking p_instance);

    //decode raw measurments to floats data
    bme280_measurement_data_t data;
    bme280_decode_measurement_data p_instance, &data);

    //print measurement
    NRF_LOG_RAW_DEBUG("P:"NRF_LOG_FLOAT_MARKER"Pa\r\n", NRF_LOG_FLOAT(data.pressure));
}

void example_func(void)
{
    //Initialize Weather Shield
    bme280_init(&bme280_instance);

    //select pressure oversamping to get the pressure data
    bme280_sampling_cfg_t measurements;
    measurements.press_sampling = BME280_OVS_1X;

    //configure Weather Shield with measurements structure
    bme280_configure_sampling(&bme280_instance,&measurements);

    //Enable normal mode and autosampling every 500ms
    bme280_configure_power_mode(&bme280_instance, BME280_MODE_NORMAL, BME280_T_SB_500_MS);
    //Send our configurations to the Smablo Weather Shield
    bme280_commit_blocking(&bme280_instance);
    //create timer
    ret_code_t err_code=app_timer_create(&weather_timer, APP_TIMER_MODE_REPEATED, weather_handler);
    APP_ERROR_CHECK(err_code);

    //start weather_timer timer to call weather_handler every 500ms
    err_code=app_timer_start(weather_timer,APP_TIMER_TICKS(500),&bme280_instance);
    APP_ERROR_CHECK(err_code);
}
Example above measures pressure in normal mode with autosampling feature. We can change the default forced mode with bme280_configure_power_mode() in a second parameter and the rate that the Weather sensor will sample the measurements on it own in the third parameter. In our example the Shield will autosample the pressure data every 500 ms. Reading, decoding and printing the measurements are handled with timer that every 500ms is executing weather_handler() function, more information about timers and how to use them are explained here.
Measure with filter
//create instance of weather shield
static bme280_instance_t bme280_instance=SM_BME280_INSTANCE;

void weather_handler(void *p_ctx)
{
    //Dereference instance pointer. Make it instance type from void ctx.
    bme280_instance_t* const p_instance=(bme280_instance_t*)p_ctx;

    //get the meausremnnts
    bme280_get_measurement_data_blocking(p_instance);

    //decode raw measurments to floats data
    bme280_measurement_data_t data;
    bme280_decode_measurement_data(p_instance, &data);

    //print measurement
    NRF_LOG_RAW_DEBUG("P:"NRF_LOG_FLOAT_MARKER"Pa\r\n", NRF_LOG_FLOAT(data.pressure));
}

void example_func(void)
{
    //Initialize Weather Shield
    bme280_init(&bme280_instance);

    //select pressure oversamping to get the pressure data
    bme280_sampling_cfg_t measurements;
    measurements.press_sampling = BME280_OVS_1X;
    measurements.filter_setting = BME280_FILTER_COEF_4;

    //configure Weather Shield with measurements structure
    bme280_configure_sampling(&bme280_instance,&measurements);

    //Enable normal mode and autosampling every 500ms
    bme280_configure_power_mode(&bme280_instance, BME280_MODE_NORMAL, BME280_T_SB_125_MS);

    //Send our configurations to the Smablo Weather Shield
    bme280_commit_blocking(&bme280_instance);

    ret_code_t err_code=app_timer_create(&weather_timer, APP_TIMER_MODE_REPEATED, weather_handler);
    APP_ERROR_CHECK(err_code);

    //start weather_timer timer to call weather_handler every 500ms
    err_code=app_timer_start(weather_timer,APP_TIMER_TICKS(500),&bme280_instance);
    APP_ERROR_CHECK(err_code);
}
Example above measures pressure in normal mode with autosampling feature just like in the Measure using autosampling example but the main difference is that the filter was added in measurements structure with measurements.filter_setting = BME280_FILTER_COEF_4; line. BME280_FILTER_COEF_4 coefficient which means that the four consecutive measurements will be averaged to one measurement. Our timer will still read, decode and print the measurements every 500 ms thus to every time print the new measurement we need to change the auto sampling to BME280_T_SB_125_MS to sample every 125ms. Using filter makes the readings more resistant to rapid pressure changes from for example wind blowing.
drv_bme280 driver reference
To make your work with Smablo products easier and faster we prepared drv_bme280 library for use with Weather Shield. All of available functions and their descriptions can be found in drv_bme280.h.
The functions in this library can be divided into 3 groups and to always expect proper work of the Smablo Top LED and Buttons Shield you should use them in this sequence:
- Initialization functions like bme280_init() that should be used once at the beginning of your program,
- Configuration functions like bme280_configure_power_mode() that will configure our shield, but remember it’s all they do, configure functions won’t change anything until we will use the next type of functions,
- Get data function bme280_get_measurement_data() and triggering bme280_trigger_sampling_blocking() functions that will read or write some data to the shield
- Commit functions like bme280_commit_blocking() those functions will send all of the configurations made to shield. Only after executing this type of function you will see the change of behaviour of the Top LED and Buttons Shield.
So your code should look similar to the below snippet
#include "nrf_log.h"
#include "nrf_delay.h"
#include "drv_bme280.h"

//create instance of weather shield
static bme280_instance_t bme280_instance=SM_BME280_INSTANCE;

void example_func(void)
{

    //Initialize Weather Shield
    bme280_init(&bme280_instance);

    //select which data we want to measure
    bme280_sampling_cfg_t measurements =
    {
        .temp_sampling=BME280_OVS_1X,
        .hum_sampling=BME280_OVS_1X,
        .press_sampling=BME280_OVS_1X
    };

    //configure Weather Shield with measurements structure
    bme280_configure_sampling(&bme280_instance,&measurements);

    //Send our configurations to the Smablo Weather Shield
    bme280_commit_blocking(&bme280_instance);

    //trigger single measurement
    bme280_trigger_sampling_blocking(&bme280_instance);

     //wait for measurement to complete
    nrf_delay_ms(10);

    //get the meausremnnts
    bme280_get_measurement_data_blocking(&bme280_instance);

    //decode raw measurments to floats data
    bme280_measurement_data_t data;
    bme280_decode_measurement_data(&bme280_instance, &data);

    //print data on screen
    NRF_LOG_RAW_DEBUG("T: "NRF_LOG_FLOAT_MARKER" degC. H:"NRF_LOG_FLOAT_MARKER"Rh",
                      NRF_LOG_FLOAT(data.temperature), NRF_LOG_FLOAT(data.humidity));

    NRF_LOG_RAW_DEBUG("  P:"NRF_LOG_FLOAT_MARKER"Pa\r\n", NRF_LOG_FLOAT(data.pressure));
}
The enumeration types and structures that will be required by the function are located on the top of the file, we will often come back to them to change the parameters of the on shield features.
bme280_init
Prototype:
void bme280_init(bme280_instance_t* const p_instance)Function is used for initialize the shield. Use it once at the beginning of our program like in code snippet above. Function takes one parameter which is pointer to bme280_instance_t type instance.
bme280_reset
Prototype:
void bme280_reset(bme280_instance_t* const p_instance)Function is used for performing reset operation and will restore all default parameters to the shield. Function takes one parameter which is pointer to bme280_instance_t type instance.
bme280_configure_power_mode
Prototype:
void bme280_configure_power_mode(bme280_instance_t* const p_instance, const bme280_mode_state_t mode, const bme280_t_sb_t t_sb)Function is used for configurating power mode and oversampling rate. Function takes 3 parameters :
- p_instance type
bme280_instance_twhich is Weather shield instance address. - mode type
bme280_mode_state_tthat configures mode of operation of the shield. You can choose between 3 modes :BME280_MODE_SLEEPsleep mode (low power mode when no measurement are needed )BME280_MODE_FORCEDforced mode (default) in which user need to trigger the measurementBME280_MODE_NORMALnormal mode where oversampling feature can be used
- t_sb type
bme280_t_sb_tthat configures standby time between samples inBME280_MODE_NORMAL, can be set toBME280_T_SB_IGNOREoutside ofBME280_MODE_NORMAL
bme280_configure_sampling
Prototype:
void bme280_configure_sampling(bme280_instance_t* const p_instance, const bme280_sampling_cfg_t* const sampling_cfg)Function is used for configuration which data we want to sample and turning on or off the IIR filter. Function takes 2 parameters:
- p_instance type
bme280_instance_twhich is Weather shield instance address. - sampling_cfg type
bme280_sampling_cfg_twhich is pointer to the same type structure which we need to create earlier. Use of this function was shown in drv_library code snippet
bme280_decode_measurement_data
Prototype:
void bme280_decode_measurement_data(bme280_instance_t* const p_instance, bme280_measurement_data_t* const p_data)Function is used for decoding the that was read from shield with bme280_get_measurement_data_blocking() or bme280_get_measurement_data() functions. Function takes 2 parameters:
p_instance type bme280_instance_twhich is Weather shield instance address.p_data type bme280_measurement_data_twhich is pointer to structure data you need to create earlier. Then the data in the structure are save as floats .
bme280_commit_blocking
Prototype:
void bme280_commit_blocking(bme280_instance_t* const p_instance)Function is used for sending the configuration we made to the shield in blocking manner. Function takes one parameter: p_instance type bme280_instance_t which is Weather shield instance address.
bme280_get_measurement_data_blocking
Prototype:
void bme280_get_measurement_data_blocking(bme280_instance_t* const p_instance)Function is used for reading humidity, temperature and pressure data from the Shield if they were set in the bme280_configure_sampling() function in blocking manner.
Function takes one parameter : p_instance type bme280_instance_t which is Weather shield instance address.
Be aware that this function will read all the data(humidity, temperature, pressure ) from the shield and if the sample this data was not set in the
bme280_configure_samplingfunction in structure second parameter the reading of that data will be false.
bme280_get_measurement_data
Prototype:
void bme280_get_measurement_data(bme280_instance_t* const p_instance, bme280_async_handler_t handler, bme280_async_ctx_t* const p_ctx);Function is used for reading humidity, temperature and pressure data from the Shield if they were set in the bme280_configure_sampling() function in asynchronous manner. Function takes 3 parameters :
- p_instance type
bme280_instance_twhich is Weather shield instance address. - handler type
bme280_async_handler_twhich is pointer to user handler function that will be called after all data is read - p_ctx type
bme280_async_ctx_twhich is asynchronous context data structure which is needed in asynchronous functions. If you want to use this function you need to create this type of structure earlier.
Be aware that this function will read all the data(humidity, temperature, pressure ) from the shield and if the sample this data was not set in the
bme280_configure_samplingfunction in structure second parameter the reading of that data will be false.
bme280_trigger_sampling_blocking
Prototype:
void bme280_trigger_sampling_blocking(bme280_instance_t* const p_instance)Function is used for triggering single measurement when Weather Shield is in forced(default) mode in blocking manner. Function takes one parameter : p_instance type bme280_instance_t which is Weather shield instance address.
bme280_trigger_sampling
Prototype:
void bme280_trigger_sampling(bme280_instance_t* const p_instance, bme280_async_handler_t handler, bme280_async_ctx_t* const p_ctx)Function is used for triggering single measurement when Weather Shield is in forced(default) mode in asynchronous manner. Function takes parameters:
p_instancetypebme280_instance_twhich is Weather shield instance address.- handler type
bme280_async_handler_twhich is pointer to user handler function that will be called after all data is read p_ctxtypebme280_async_ctx_twhich is asynchronous context data structure which is needed in asynchronous functions. If you want to use this function you need to create this type of structure earlier.
Advanced
Parameters for most common use cases
For most common uses at page 17 in bme280 datasheet there recommended modes of operation. For example for Weather monitoring there is table that describes what to measure and what parameters to set :
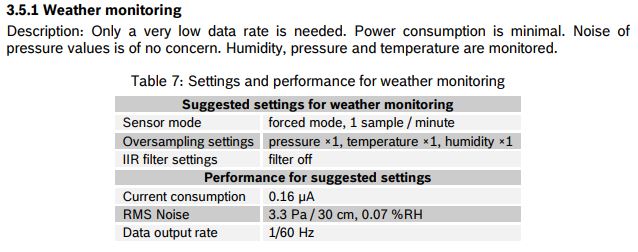
You can use these paramters in your projects or model your own that suiuts your needs.
Modes of operation
Smablo Weather Shield can works in three modes of operation: sleep mode, normal mode and forced mode. We can set the modes using the bme280_configure_power_mode function .
- In sleep mode there are no measurements performed and the power consumption in minimum.
- In Forced mode there is no autosampling and the measurements are performed by forcing the sensor to do measurements on requests using for example
bme280_trigger_sampling_blockingand then read data from the sensor usingbme280_get_measurement_data_blockingfunction. After each measurements the sensor goes into sleep until the next force measurement is requested. - In normal mode we are setting autosampling rate which means that the sensor will perform measurements on its own and we only need to read the measurements from the sensor using
bme280_get_measurement_data_blockingfunction .